No Internet Secured Error in Windows 10
In general, internet connectivity problem due to “No Internet Secured” error is noticed when a Windows PC or Surface tablet is trying to connect to an available WiFi Network. However, it is also not unusual or uncommon for a Windows computer to come up with “No Internet Secured” error in the middle of a browsing session. In many cases, this error can be fixed by restarting or Rebooting Modem/Router. Hence, it is highly recommeded that you restart the Modem/Router, before going ahead with other methods.
1. Try Network Troubleshooter
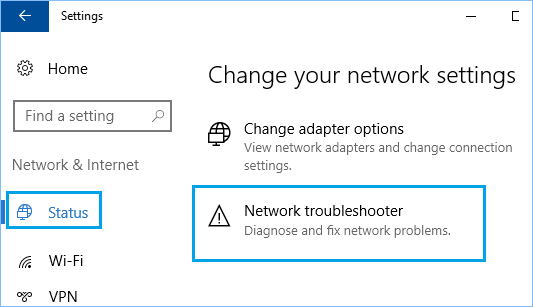
Windows 10 comes with its own Internet Connections Troubleshooter that can help diagnose and fix Internet connectivity problems. Go to Settings > Network & Internet > On the next screen, select Status in the left-pane. In the right-pane, scroll down and click on Network Troubleshooter.
Follow the onscreen instructions as Network Troubleshooter tries to identify and fix network problems on your computer.
2. Troubleshoot Network Adapter
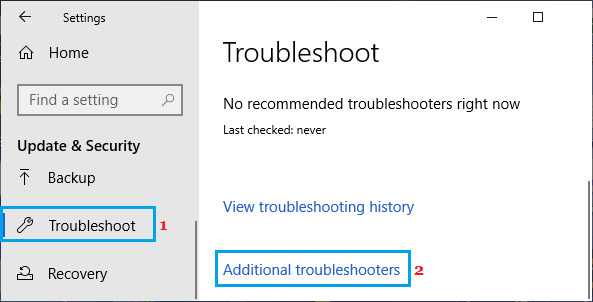
If Network Troubleshooter did not help, try to fix the Network Adapter. Go to Settings > Update & Security > On the next screen, select Troubleshoot in the left pane. In the right-pane, scroll down and click on Additional Troubleshooters.
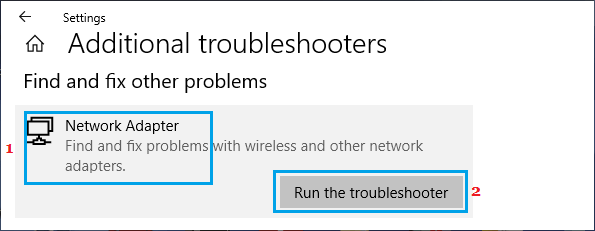
On the next screen, click on Network Adapter and then click on Run the Troubleshooter button.
Allow the Troubleshooter to fix and fix problems with the Network Adapter on your computer.
3. Renew Your Computer’s IP Address
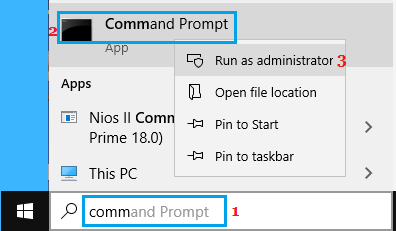
Your computer might be having difficulty connecting to the network, because it is not getting a valid IP Address from your Modem or Router. This issue can be fixed by making your computer request a New IP Address from the DHCP server (Router). Type CMD or Command Prompt in the Search bar > right-click on Command Prompt in the search results and select Run as Administrator option.
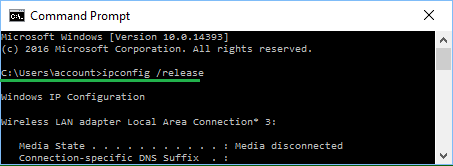
In Command prompt window type ipconfig /release and hit the Enter key. This will release the current IP Address of your computer
Next, type ipconfig /renew and hit the Enter key to Renew the IP Address of your computer.
Type exit to quit the Command Prompt Window. After this, you should be able to connect to the internet.
4. Reset TCP/IP Settings
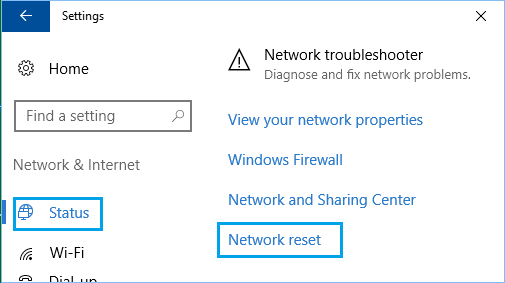
This process will overwrite all your current Network settings and replace them with original settings. Hence, it is a good idea to note down your VPN or other network configuration details. Go to Settings > Network & Internet > On the next screen, select Status in the left-pane. In the right-pane, scroll down and click on Network Reset option.
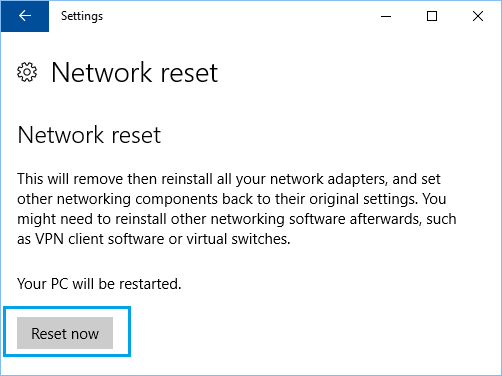
On the next screen, click on the Reset Now button.
Once your Computer Restarts, all the Network Settings will be reset to their default values.
5. Update Network Adapter
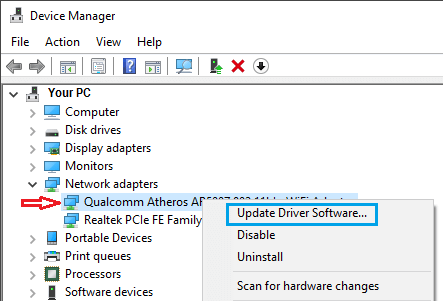
Sometimes an outdated or corrupted Network driver can prevent your computer from connecting to the internet. Right-click on Start button and select Device Manager option. On Device Manager screen, expand Network Adapters entry > right-click on your Network Adapter and click on Update Driver Software option.
On the next screen, select Search Automatically option and allow Windows to search for updated driver software and install it on your computer.
6. Disable IPV6
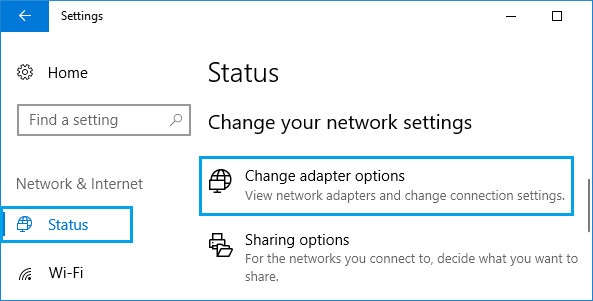
While it is rare for IPv6 to cause WiFi Connectivity issues, users have reported fixing “No Internet Secured” error on their computers by disabling IPv6 protocol. Go to Settings > Network & Internet > On the next screen, select Status in the left-pane. In the right-pane, scroll down and click on Change Adapter options.
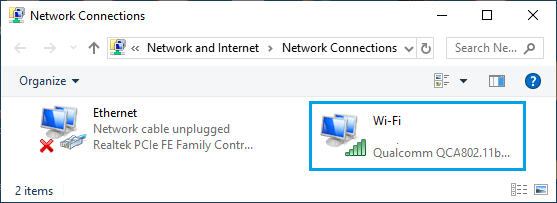
On Network Connections screen, double-click on your Current WiFi Network.
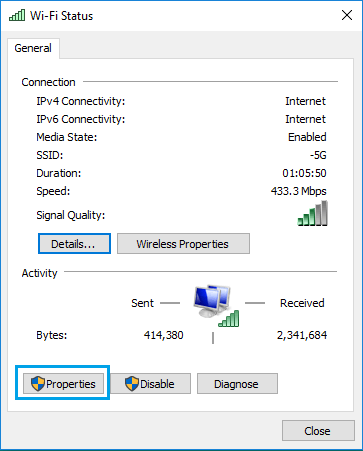
On the next screen, double-click on the Properties button.
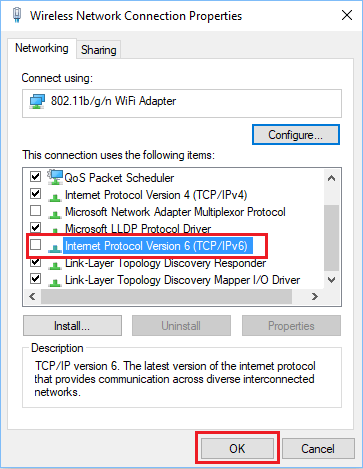
On Network properties screen, uncheck Internet Protocol Version 6 (TCP/IPv6) option and click on OK to save this setting.
Make sure that you Restart the Computer and see if ut can now connect to internet.
How to View WiFi Password in Windows 10 How to Optimize and Defragment Hard Drive in Windows 10

