Methods to Change IP Address in Windows 10
Here, we have fetched the best two methods to change the IP address in your Windows 10. These steps are simple and effective to apply in order to set the IP address.
1. Change IP Address in Windows 10
Right-click on the Internet icon from the taskbar of your computer and then click on the “Open Network and Sharing Center.”
Now, click on the Connections from the Network and Sharing Center.
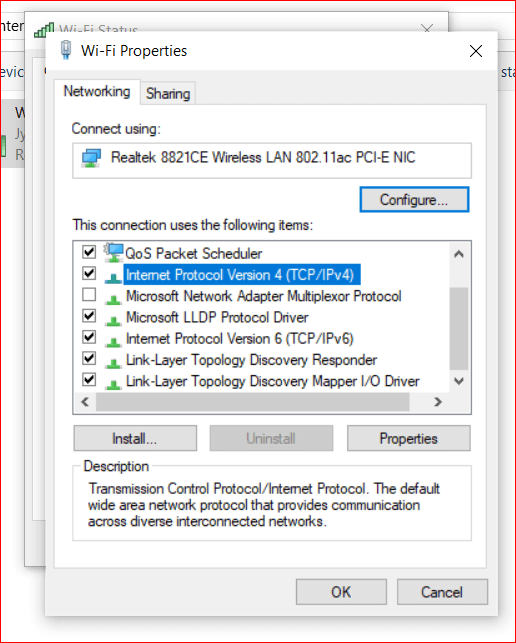
You will see that a new Wireless Connection status window has opened up. You have to click on the properties now.
Now, you will see a network connection status pop-up window on the screen. Click on Internet Protocol Version 4 (TCP/IPv4) or Internet Protocol Version 6 (TCP/IPv6), whichever IP address that you wish to change.
Now you have to put in the IP address that is required and then hit OK. And this is how you change the IP address in Windows 10. Sometimes, along with the IP address, you are also given a Subnet mask, Default gateway and DNS Server address by your network administrator. You can use those addresses to fill in the required details. Read Also: How to Hide Your IP Address For Free
2. Change the IP Address in Windows 10 Using the Settings App
You might prefer this method for its easy steps to change the IP address in Windows 10. Using the settings app carries probably the simplest steps to help you in changing the IP address of your Windows 10 PC. Follow these steps to change the IP address:
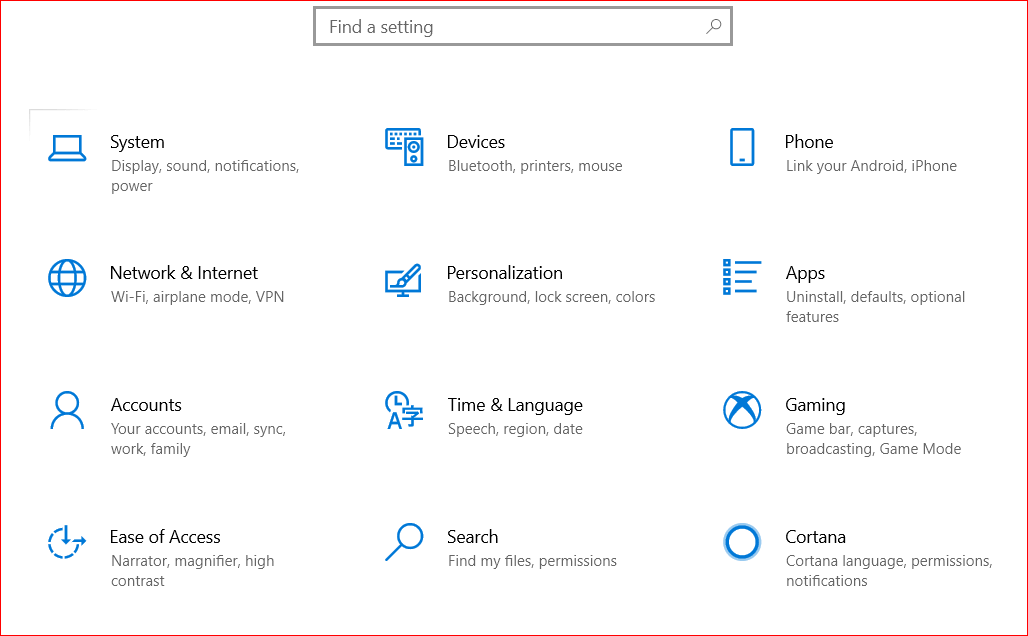
Open the Settings app. In the Settings app, go to the Network and Internet category.
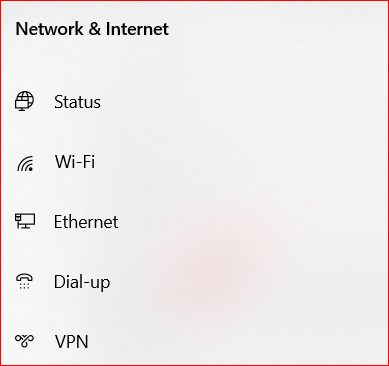
Now, you have to select your network type from the left sidebar. If your internet is connected via a wireless card then select Wi-Fi. Click on Ethernet if you have connected the Internet using a wired connection.
Click on the name of network connection which appears on the right side of the Window.
In the next step, you have to scroll down to the page where you can find the details of your network connection. There you have to look for the section called IP settings. Once you find IP settings, click on Edit under IP assignment. Now you will see the Edit IP settings dialog in the Settings app. From this section, you can change the IP address of your device. To change the IP address of Windows 10 PC in order to be assigned automatically by the router, you have to select Automatic which is called dynamic IP address. Read More: How To Increase Upload Speed On Internet You can select Manual and then enable the IPv4 and/or IPc6 switches (It depends on what internet protocols you wish to use.) in order to set your own IP address. Since both of them feature different IP addresses, you need to enter the details for both IPv4 and IPv6 if you want to enable both. You are required to enter the following details in order to change your IP address to a static one. Whether it is for your IPv4 or IPv6 protocol, there are certain details that need to be entered.
IP address: You have to type the static IP address that you want to use.Subnet prefix length: Then you are required to type the prefix length that determines the size of the subnet. Gateway: The next is Gateway where you type the IP address of your router.
Once you have entered the details, you can now click on the Save option in order to apply the settings that you have made to Change the IP address. Before saving the settings, make sure that the details that you have entered are correct because if they are not, your Windows 10 will lose the internet connection.
Which Method Do You Prefer to Change IP Address in Windows 10?
In this article, you came across two simple methods to change IP address in your Windows 10 and also to set it from dynamic to static. Which way do you think is the simplest and best way to change the IP address in Windows 10? Share your views and suggestions with us in the comment box.


