Processor Cache Memory in Windows 10
The idea behind providing the Processor with its own Cache Memory is to store the most frequently used information required by the CPU in the Processor Cache. Since, the most frequently used data is readily available within the Cache, the processor does not have to spend time accessing this information from main memory (RAM) of the computer. Compared to the main memory (RAM), the Processor Cache provides faster access to information, resulting in faster processing of programs and data on a computer. Compared to RAM, Processor Cache Memory is more expensive, which explains the reason for lesser amounts of Processor Cache Memory being used in computers.
Types of Processor Cache Memory Used in Computers
When you check Processor Cache Memory on a computer, you are likely to find the following types of Processor Cache Memories. While L1 cache is not often made available on computers, you will most likely find Processors of mid and high end computers being equipped with L2 and L3 Cache Memory. You will find below different methods to check Processor Cache Memory on a Windows 10 computer.
1. Check Processor Cache Memory Size Using Task Manager
The Task Manager in Windows 10 provides detailed information about the Processor installed on your computer, including L1, L2, and L3 Processor Cache sizes.
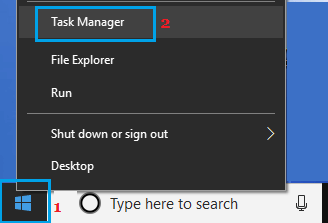
Right-click on the Start button and click on Task Manager.
On the Task Manager screen, click on the Performance tab > click on CPU in the left pane. In the right-pane, you will see L1, L2 and L3 Cache sizes listed under “Virtualization” section.
As you can see in the image above, the CPU in this case has very small L1, L2 and L3 Cache size.
2. Check Processor Cache Memory Size Using Command Prompt
Follow the steps below to find Processor Cache Memory size using the command prompt in Windows 10.
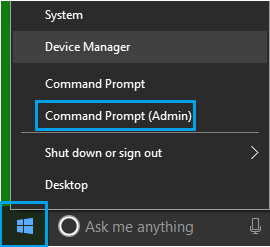
- Right-click on Start button and click on Command Prompt (Admin) option.
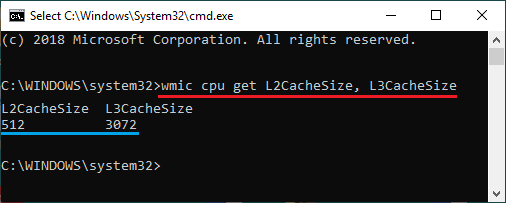
Note: You can also open Command prompt by searching for CMD in Windows 10 search bar. 2. On the Command Prompt screen, type wmic cpu get L2CacheSize, L3CacheSize and press the Enter key on the keyboard of your computer.
- Once the command is executed, you will find L2, L3 Cache size information displayed on the screen.
3. Check Processor Cache Memory Using Settings
Another way to check Processor Cache Memory is by using the Settings App on your computer.
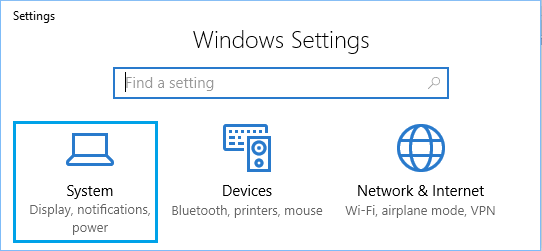
Open Settings and click on the System tab.
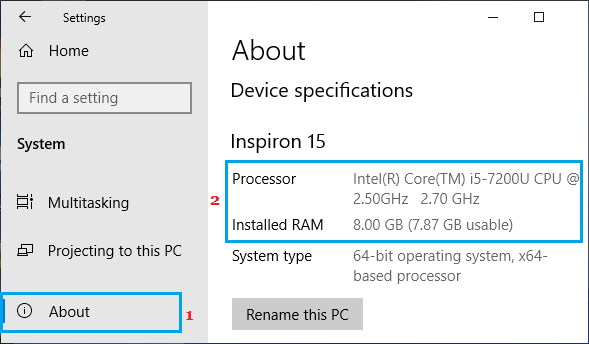
On the next screen, scroll down and click on About in the left pane. In the right-pane, you will be able to see the Processor Make, Model and Speed.
Once you know the make and model of the processor, you can get information about the processor, including its Cache Memory Size by looking for “Intel Core i5-7200” processor details on Google.
How to Check Hardware Specs in Windows 10 How to Find Serial Number of Computer in Windows 10