Create Local Account in Windows 10
When you setup a New computer or Reinstall Windows 10, you will be prompted to use or create a Microsoft Account, which can be used to login to the computer. If you prefer not to use a Microsoft Account for day-to-day computing, you can either Convert Microsoft Account into Local User Account or create a New Local User Account. There is no limit to the number of Local Accounts that you can create in Windows 10 computer. Also, you can grant Admin Privileges to any Local Account on your computer.
1. Steps to Create Local User Account in Windows 10
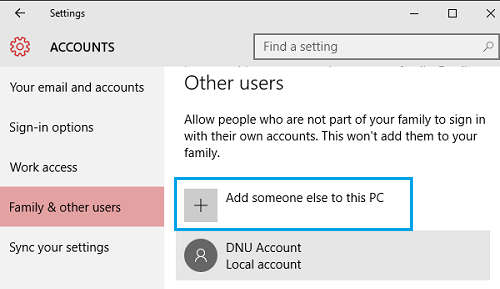
Go to Settings > Accounts > select Family & other users in the left-pane. In the right-pane, click on Add someone else to this PC option.
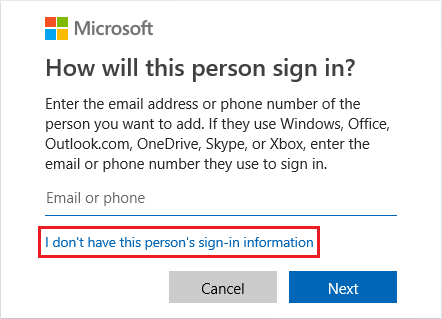
On the next screen, click on I don’t have this person’s sign-in information link.
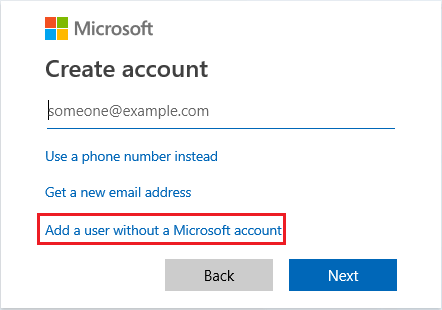
On Create Account screen, click on Add a user without a Microsoft account option.
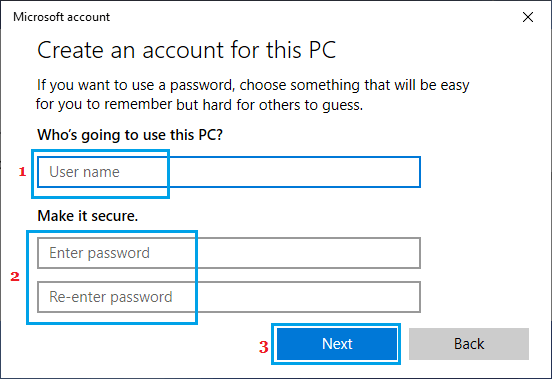
On the next screen, you will see the familiar Windows Account creation screen. Enter User Name, Password, re-enter the Password and click on Next.
When you click Next, Windows will take you back to Accounts screen where you will be able to see the New Local User Account that you just created. Note: You need to be logged in as an Administrator in order to create New User Account using above steps.
2. Change Local Account to Administrator Account
By default, Windows 10 creates Local User Accounts with standard or limited privileges, but you can grant Admin Privileges to any Local Account on your computer.
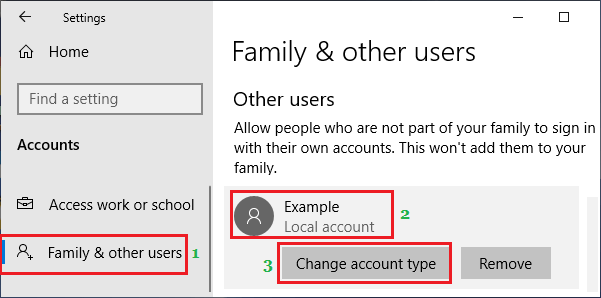
Go Settings > Accounts > select Family & Other Users in the left-pane. In the right-pane, select the Local Account and click on Change Account Type button.
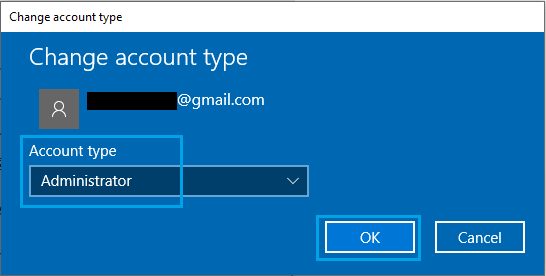
On the next screen, click on the Down Arrow under Account Type and select the Administrator option.
Click OK to complete the User Account Type change on your computer.
How to Delete User Account In Windows 10 How to Reset Local User Account Password in Windows 10

