Disable Webcam in Windows 10
Most Laptop computers come with built-in or integrated webcams, which makes it easy to video chat with family, friends, relatives or use the webcam for business related conferencing. However, there are some users who want to disable the webcam on their computer for security and other reasons. Hence, we are providing below the steps to Disable Webcam in Windows 10 and also the steps to Enable the Webcam back, in case you decide to use the Webcam.
1. Disable Webcam in Windows 10 Using Device Manager
Follow the steps below to switch OFF the Webcam on your computer using device manager.
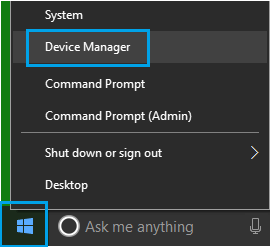
Right-click on the Start button and click on Device Manager in the menu that appears.
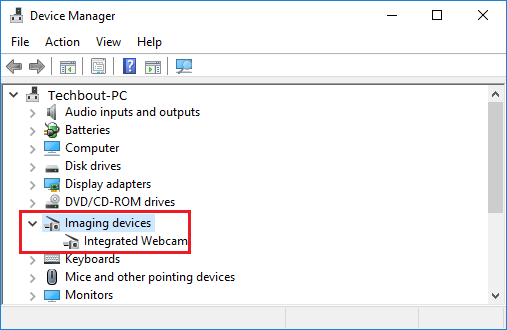
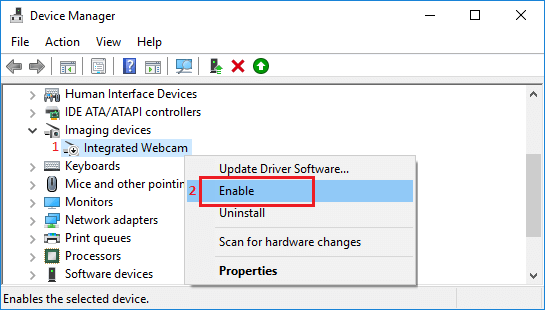
On the Device Manager screen, expand the entry for Cameras or Imaging Devices.
3. Next, right-click on Integrated Webcam and click on Disable in contextual menu that appears.
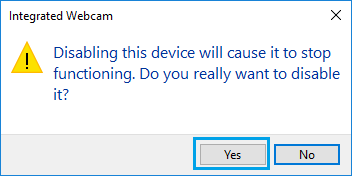
On the Confirmation pop-up, click on Yes to confirm your action.
Restart your computer. The above steps will Turn OFF the integrated Webcam on your Windows 10 Computer.
2. Enable Webcam Using Device Manager
At any time you can enable back the Webcam on your computer by following the steps below.
Right-click on the Start button and click on Device Manager.
On the Device Manager screen, expand Cameras or Imaging devices entry.
3. Next, right-click on Integrated Webcam and click on Enable in the contextual menu that appears.
After this restart your computer and you will be able to use the Camera once again on your computer.
How to Turn Off or Disable Microphone in Windows 10 How to Stop Skype From Starting Automatically in Windows 10