100% Disk Usage in Windows 10
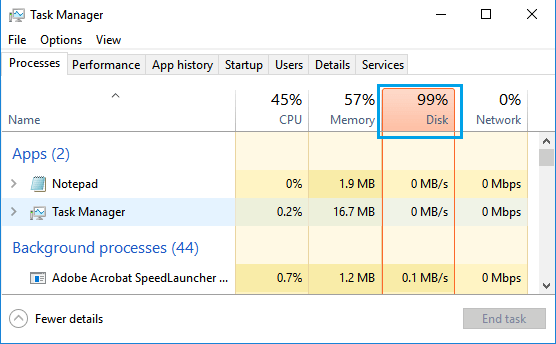
Typically, 100% Disk Usage in Windows 10 leads to a painfully slow computer, even though you only have few programs open on your computer. To confirm, right-click on the Start button and select Task Manager. in WinX menu. On the Task Manger Screen, switch to Processes tab and take a look at the Disk column.
If the Disk column is marked red with High Disk Usage (88 to 100%), the resource usage on your computer is maxed out and you need to take corrective actions to fix this problem.
1. Restart the Computer
The easiest way to reduce High Disk Usage on a Windows computer is to restart the device. This will terminate all the running programs and processes that were using up all the resources on your computer. While this is a temporary solution, it will make it easy for you to use the computer and implement other measures to reduce Disk Usage on your computer.
2. Prevent Skype from Running in Background
If Skype is installed on your computer, you need to make sure that Skype App or Skype Desktop Program is not starting automatically on your computer and using up resources by running in background. To prevent Skype from running in background, you can refer to this guide: How to Stop Skype From Running in Background in Windows 10
3. Disable Tips, Tricks & Suggestions
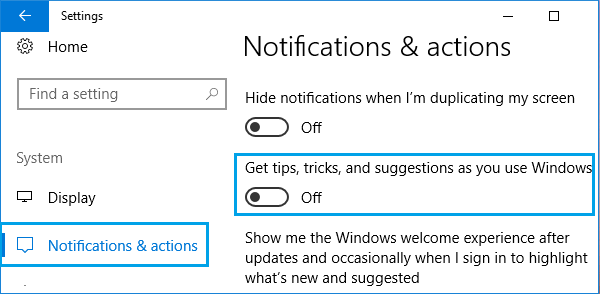
Get Tips, Tricks and Suggestions feature in Windows 10 has been linked to slowing down of the computer by some users. Go to Settings > System > Notifications & actions and disable Get tips, tricks, and suggestions option.
Restart your computer and you may be surprised to see it running faster than before.
4. Disable Webpage Preloading in Chrome
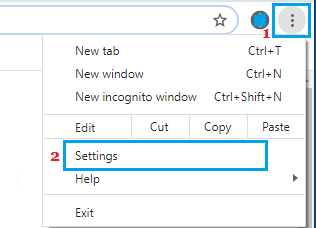
Chrome Browser is known to use high resources and an easy way to reduce usage by Google Chrome is to disable preloading of webpages. Open Chrome Browser > click on 3 dots icon and select Settings in the drop-down menu.
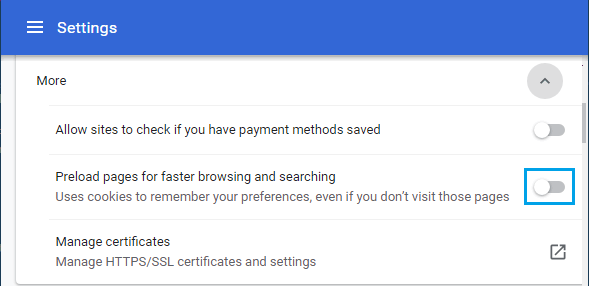
On Chrome Settings screen, scroll down to “Privacy & Security” section and click on Cookies and other site data. On the next screen, move the toggle next to Preload pages for faster browsing and searching to OFF position.
5. Change File Explorer Options
Open File Explorer > switch to View tab > click on Options tab and select Change Folder and search options in the drop-down menu.
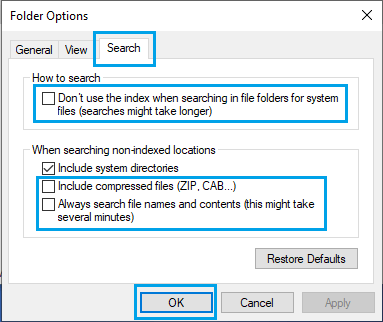
On the next screen, switch to Search tab and uncheck Don’t use index, Include Compressed files, Always search file names options.
Click on OK to save this setting on your computer.
6. Stop Windows Search
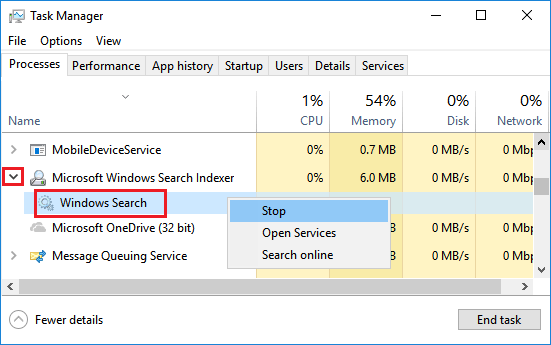
Windows Search can use up a lot of system resources, especially if it goes in a search loop or runs constantly in the background. Open Task Manager > expand Microsoft Windows Search Indexer > right-click on Windows Search and click on Stop.
If you find Disk Usage Percentage going down after disabling Windows Search, you can consider disabling Windows Search on a permanent basis.
7. Disable Windows Search
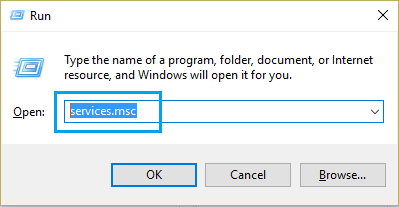
Right-click on the Start button and click on Run. In Run command window, type services.msc and click on OK.
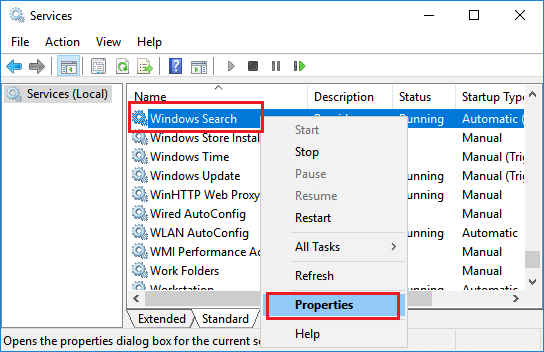
On the next screen, right-click on Windows Search and click on Properties.
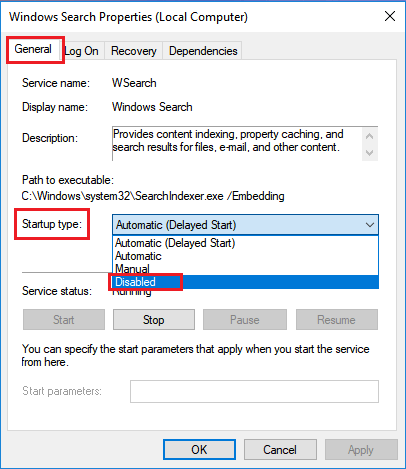
On Windows Search Properties screen, set Startup Type to Disabled.
Click on Apply and OK to save these changes on your computer.
8. Disable SuperFetch Service
While Windows SuperFetch Service can improve the performance of certain applications on your computer, it is associated with High Disk Usage and known to cause problems on older and budget computers with 4 GB or less RAM. Open Run Command > type services.msc and click on OK.
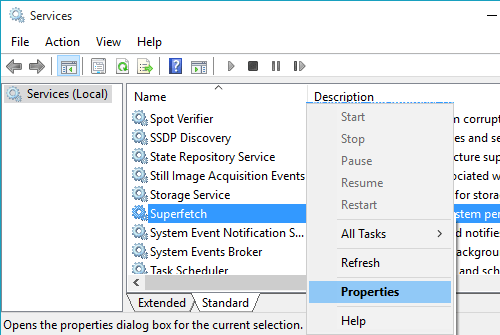
On the next screen, right-click on SuperFetch and click on Properties.
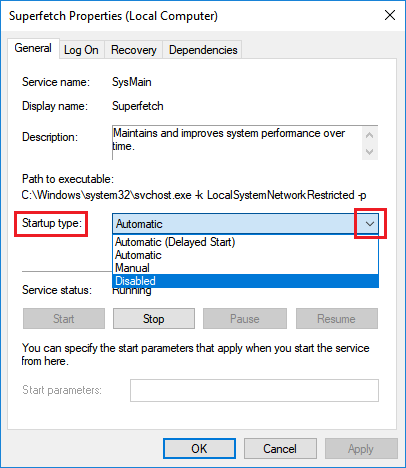
On SuperFetch properties screen, set the Startup type to Disabled.
Click on OK to save this setting on your computer.
9. Change Virtual Memory Management Settings
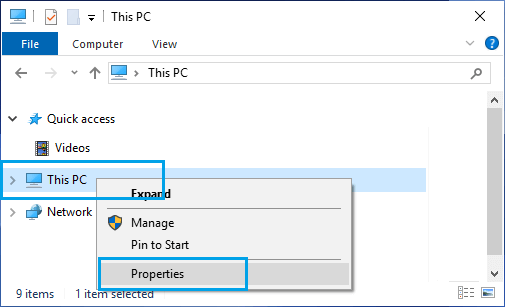
Right-click on This PC and click on Properties.
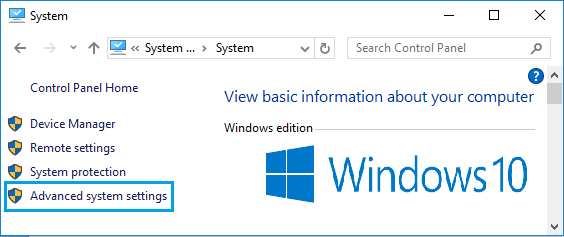
On the next screen, click on Advanced system settings.
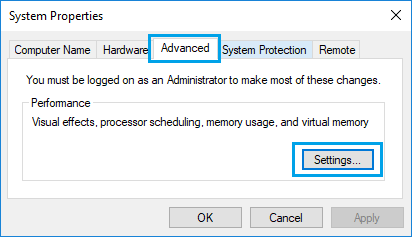
On System Properties screen, switch to Advanced tab and click on Settings button located under “Performance” section.
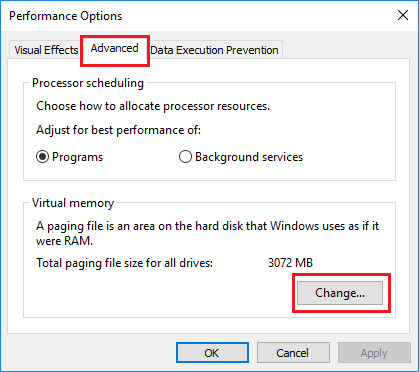
On Performance Options screen, switch to Advanced tab and click on the Change button located under “Virtual Memory” section.
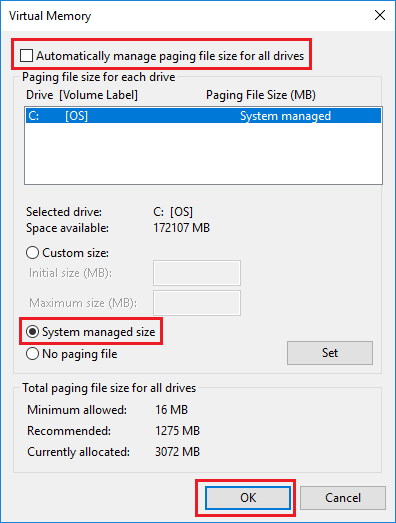
On the next screen, uncheck Automatically manage option, check System Managed size option and click on OK.
Make sure you Restart the computer for above changes to be implemented.
10. Disable MSI Mode in StorAHCI.sys Driver
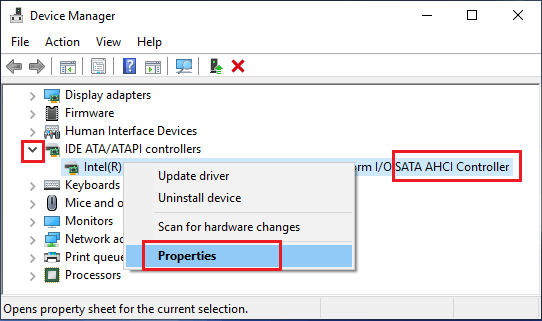
If you are facing 100% Disk usage on a Windows 10 PC with SDD drive, the problem could be due to a firmware bug that prevents SSD drives from completing input/output requests. Right-click on the Start button and click on Device Manager. On Device Manager screen, expand IDE ATA/ATAPI controllers > right-click on Standard SATA AHCI Controller and click on Properties.
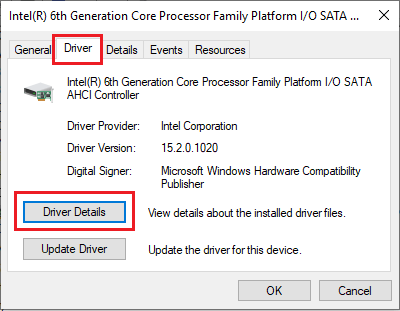
On the next screen, switch to Driver tab and click on Driver Details.
If you see storachi.sys entry on Driver Details screen, you need to disable MS Mode for the Driver by using Registry Editor fix mentioned on Microsoft’s support page.
11. Check for Viruses and Malware
Presence of Viruses and Malware on the computer can cause a variety of problems, including 100% Disk Usage Error. Hence, make sure that the Antivirus program on your computer is up to date. Also, make use of free Microsoft Safety Scanner to scan your computer for Malware and reverse changes made by Malware programs.
12. Check Hard Drive for Errors
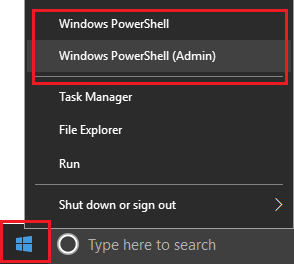
Right-click on the Start button and select PowerShell Admin or (Command Prompt Admin) option.
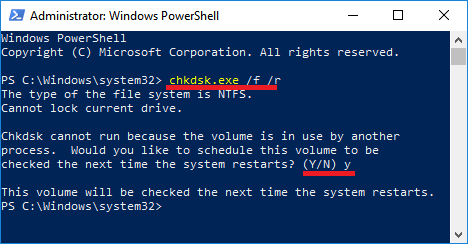
On the PowerShell window, type chkdsk.exe /f /r and press the Enter key on the keyboard of your computer. If you are prompted to schedule volume to be checked on next restart, type Y
Close the PowerShell Window, Restart your computer and patiently wait for Windows to scan the Hard drive for errors and repair bad sectors (if any). Note: This process can take a very long time (5 to 12 hours or more).
How to Fix A Corrupt User Profile In Windows 10 How to Remove Bloatware From Windows 10 PC
