Rotate Photos on Mac Using Preview App
Follow the steps below to Rotate Photos on Mac using the Preview App.
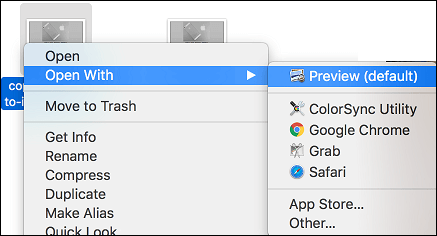
Double click on the Photo that you want to Rotate. If you have changed the default Photo viewer on Mac to something other than the Preview App, Right-click on the Photo that you want to rotate and click on Open with > Preview in the contextual menu.
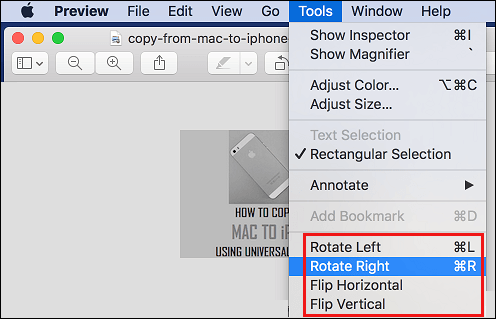
Once the Photo is open in the Preview App, click on Tools from the top menu bar and then click on the Rotate or Flip Option.
Rotate Multiple Photos on Mac Using Preview App
Follow the steps below to rotate multiple photos using the Preview app on your Mac.
- Press the Command key on your Mac’s keyboard and then select all the photos that you want to rotate.
- Next, right-click any of the selected Photos and select Open with > Preview option in the contextual menu.
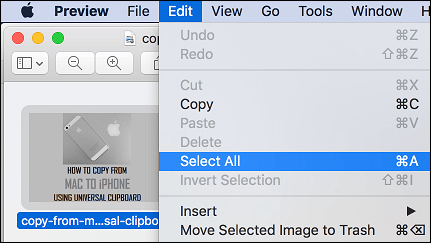
Note: All selected Photos should open in a single window. Repeat the step above in case the selected Photos open in separate or multiple windows. 3. Once the Photos open in a single window, click on the Edit tab in top-menu bar and then click on Select All option in the drop-down menu.
- Next, click on Tools option in the top-menu bar and then click on the Rotate or Flip option, whichever option suits your requirements.
Rotate Photos on Mac Using Photos App
The built in Photos App on Mac also has the ability to rotate photos. This can be quite useful in case some of the photos that you just transferred over from your iPhone are not aligned properly.
- Open the Photos App on your Mac and select the Photo that you want to rotate by clicking on it. Note: You can select multiple photos by pressing the Command key and then clicking on the Photos that you want to Rotate.
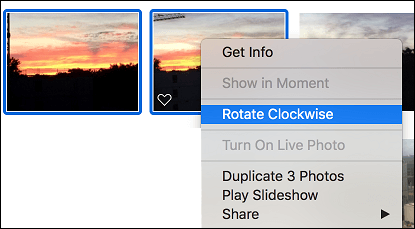
- Next, right-click on one of the selected Photos and then click on Rotate clockwise in the contextual menu that appears (See image below)
How to Add Photos to Notes on Mac
